Display or Decoration? That is the question.

How much time do you currently spend setting up your classroom displays? 1 hour, 3 hours, 10 hours? Of those hours spent, how much of that time is for the purpose of setting up interactive records of learning and how much of it is purely for display purposes?
I have always loved making my classroom gorgeous. When I taught preschool and the students wanted to learn about rainforests, I made them a fully immersive rainforest experience. When they wanted to learn about the ocean, I made them a reef.

And when they wanted to learn about space? Well, of course I made them a solar system complete with rocket and control panel made from the PMP equipment.

Preschool was where my creative, inner early years teacher was really in her element. But even in preschool, these things weren’t decoration. I worked hard to make interactive, meaningful experiences for children. The start of the term had the ‘bones’ of the area set up and as the term went on and we learned about different aspects of our theme (yes, I taught daily science lessons in preschool) the immersive area came to life. For me, it was a co-constructed experience. Part of the area was always a table with pictures to colour, plain paper to draw, pencils, crayons, sticky tape and scissors so that the children could make their own things to add to the ‘world’. We also had joint art projects that were added to the learning area, so by the end of their respective terms the reef had a huge hammerhead shark and ‘outer space’ had the sun and planets all created by the children. I then provided an iPad and QR codes next to pictures of what we had learned about so that the kids could revisit the David Attenborough or NASA videos we had watched in our lessons whenever they wanted to. I wasn’t making decorations, I was creating experiences that for the children to review and engage with learning.

As a primary teacher I’ve taught Foundation all the way through to year 6 and I’m not any less focused on making the classroom environment stimulating and interactive. Sure, I wouldn’t spend the same hours creating the experiences that I did when teaching preschool, but I still love thinking about what is going to go on the walls and how it will contribute to learning.
I’ve known some teachers who have a ‘set’ of displays that they take with them from classroom to classroom. Posters with number facts, posters that talk about parts of speech, inspirational posters and some sort of rewards chart. Each and every year they take these down and then put them back up again. Let’s just say that I’m not one of those teachers.
When I put something on a wall, I want to know that it will mean something to the children. It’s even better if it’s something that the children have created or allows us to keep a record of our learning. Now, don’t get me wrong. I’m not suggesting that you have to spend all of next weekend in your classroom making it look nice. In fact, I’d discourage you from doing that. What I am encouraging you to do is have a quick audit of your classroom walls and ask yourself, ‘how does this really support learning?’ And if you find that things could be better, make some small changes. Here are some ideas for how you might increase the effectiveness of your displays.
Phonics
Use your wall space to make the alphabetic code visible. If you have a sound wall or alphabetic code chart, is it in a place that you can refer to in your reading lessons? Do you talk about it and emphasise particular parts of the code during your teaching? I’ve had charts in the past that looked good but were just posters. Sticking a code chart on the wall and not using it is not actually that helpful for students. That’s why I prefer a ‘write on, wipe off’ alphabetic code chart. You can circle the phonemes/graphemes you are teaching, add less common graphemes as they appear incidentally and then rub it all off to have a fresh start the next week.
Vocabulary
You can supercharge your vocabulary wall by having the students draw a picture of how the word might be used and then put it on the wall. That picture can then be used as the stimulus for partner talk and meaningful use of the new vocabulary. You can also pop the cards you have created for your new vocabulary on the wall and then choose from the cards for review. Later, the cards can go in a box for further review and consolidation.
Record of lessons
A teacher recently shared how she wrote the decodable sentences from her class lessons on sentence strips cards and put them on her window. As time allowed, the students could be found reading those sentences with a partner. You may recognise this a the old, ‘read the room’ activity. Many of the old ‘whole language/balanced literacy’ activities can be repurposed with a structured literacy focused and have a meaningful part to play as review. You could do this with graphemes and words as well.
Record of your Text Based Lessons
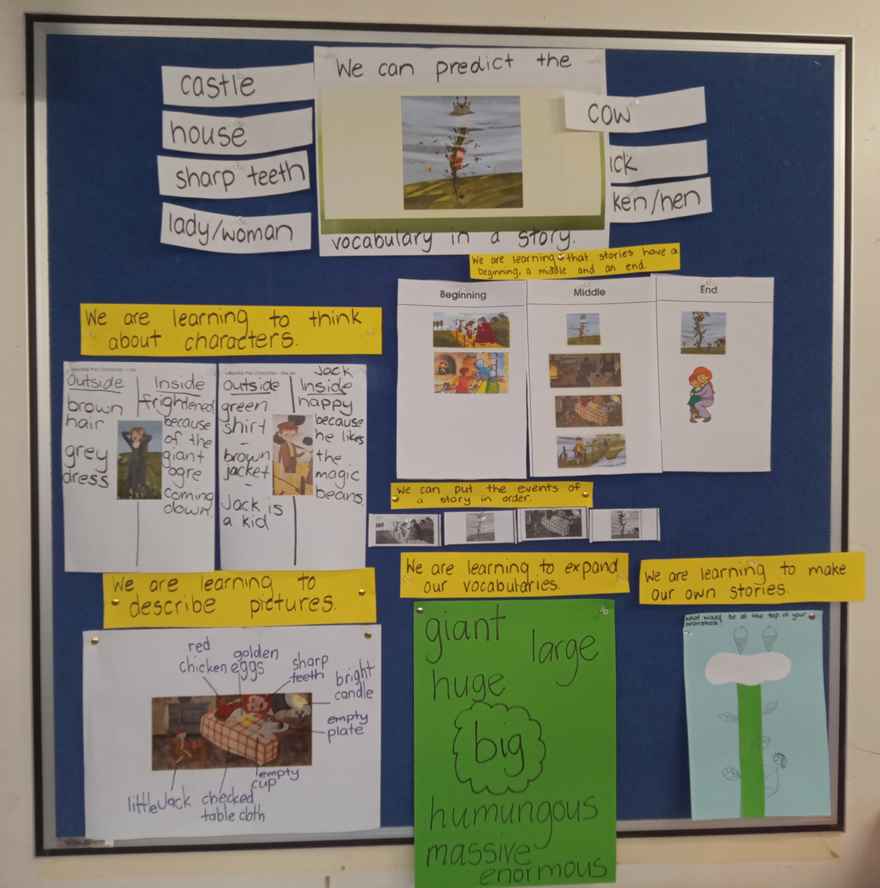
I love using rich text as the stimulus for all sorts of ‘top of the rope’ lessons. I also prefer to use the same text over a number of weeks. It really lets the children build a strong understanding of the deeper elements of the story and build the language needed for their own writing. The image below is from a Foundation class that I taught a few years ago. At the end of the unit, everything comes off the board. Those yellow cards were reused over and over and the other pictures and words added as the lessons were taught.

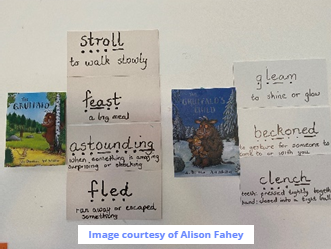
Once students can write for themselves, they can write the elements that go into the display. The word cards below were written by the students as part of the lesson, then sorted as a group and placed on the display.

However, you choose to use the walls of your classroom, remember that it has to mean something to the children. Aim for interactive, reusable elements that you can integrate into your lessons rather than those that are purely decorative.

 Jocelyn Seamer Education
1 comment
Outstanding as always. I like the term 'walls that teach' to describe this process.
Leave a comment